Installing heated flooring in a barndominium, a structure that combines the spaciousness and versatility of an open floor plan style barn with the comforts of a Custom home, can significantly enhance its livability and appeal. Heated floors not only provide a cozy surface underfoot during cooler months but also can improve the overall energy efficiency of the space. In this comprehensive guide, we’ll explore the best way to install heated flooring in a barndominium, covering the ideal timing for installation, cost considerations, and the feasibility of DIY projects.
When to Install Heated Flooring
The optimal time to install heated flooring in a barndominium is during the construction phase, especially before the final floor covering is laid. This approach allows for easier integration of the heating system into the floor structure without the need for extensive modifications later on. If you’re retrofitting heated flooring into an existing barndominium, the best time is during a major renovation when floors are being replaced or when access to the subfloor is possible.
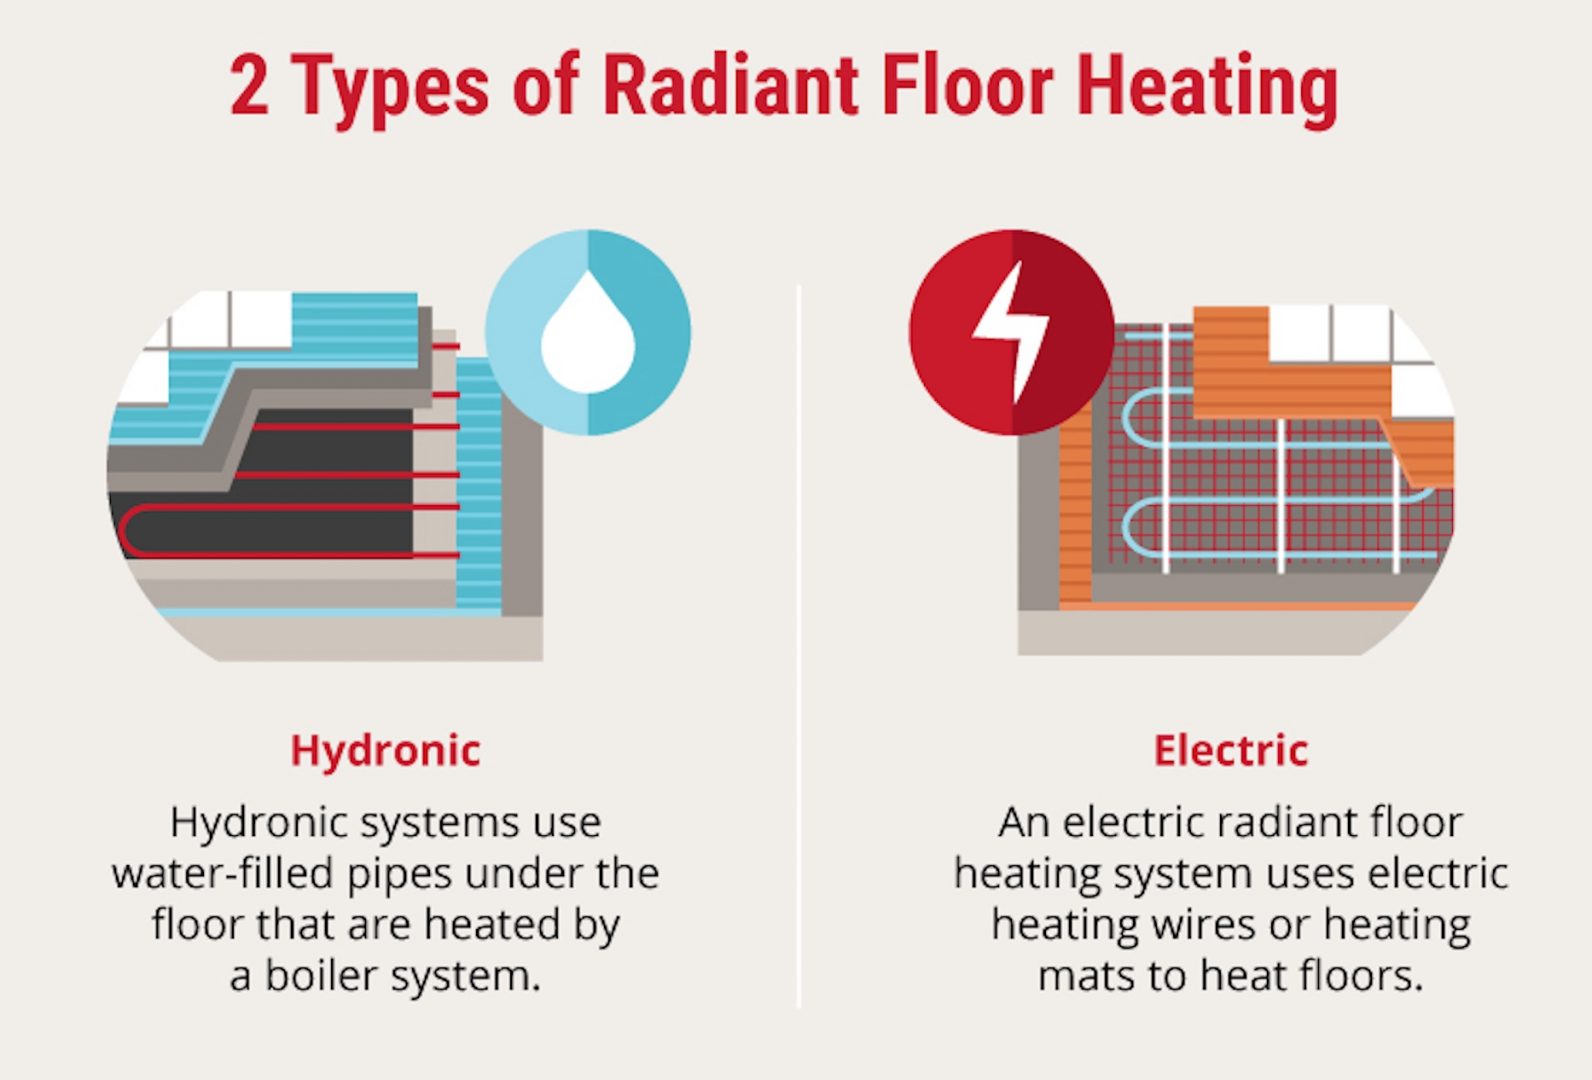
Types of Heated Flooring Systems
There are primarily two types of heated flooring systems: electric and hydronic (water-based).
– **Electric Systems**: These involve the installation of electric mats or coils beneath the floor surface. They are simpler to install, making them a popular choice for DIY projects. Electric systems are ideal for heating smaller spaces or individual rooms in a barndominium.
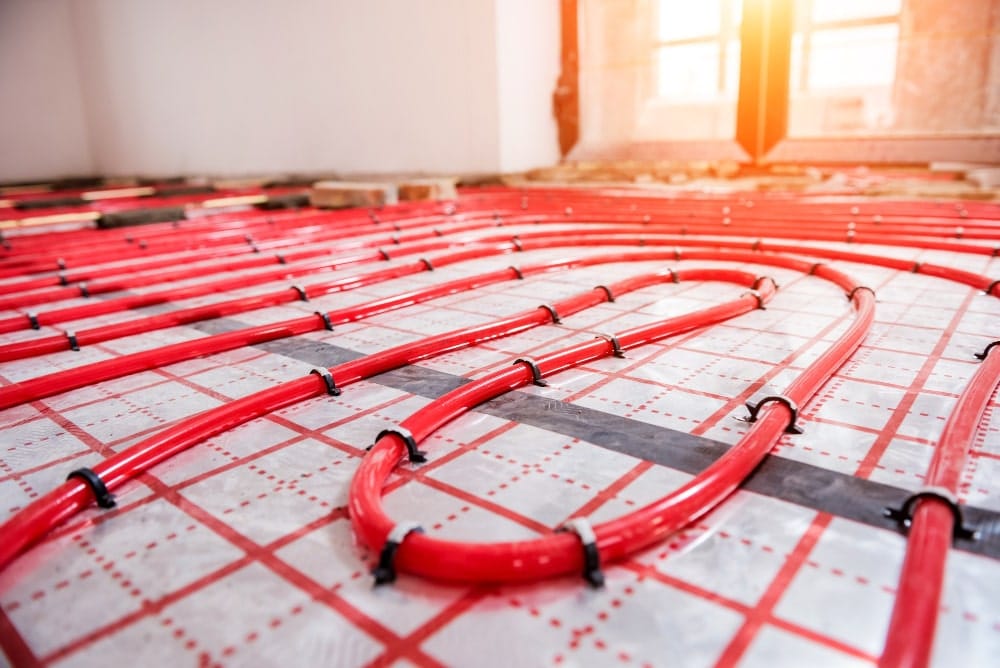
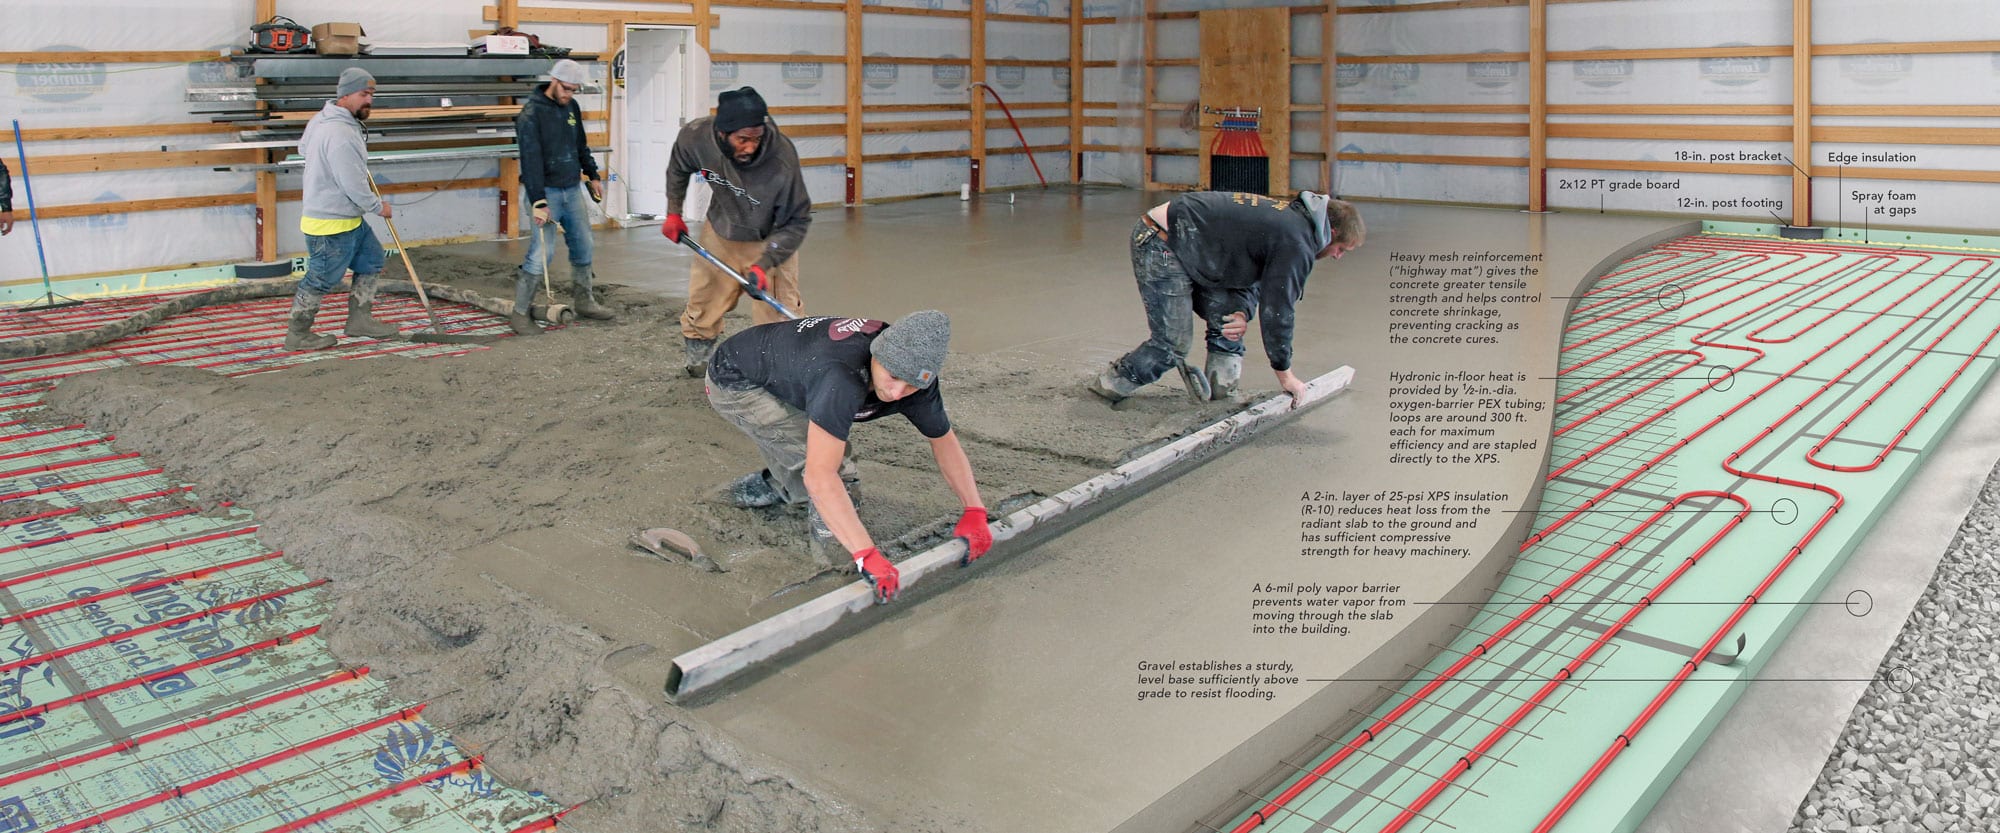
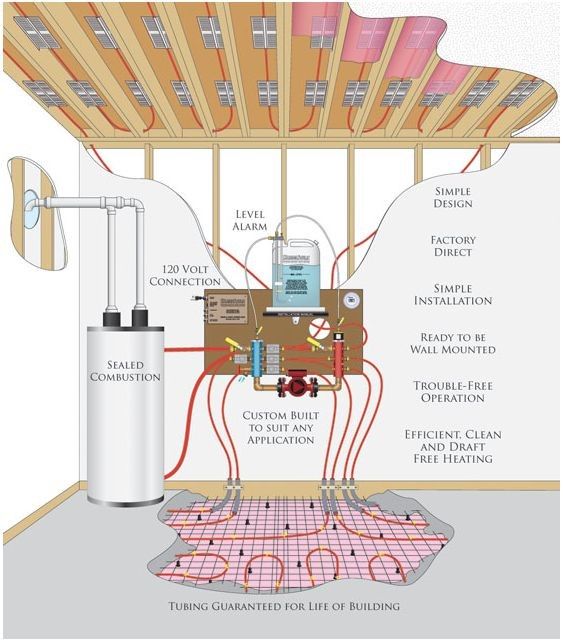
– **Hydronic Systems**: These use heated water circulated through pipes under the flooring. While they can be more efficient for heating larger spaces and are often cheaper to operate in the long term, hydronic systems are more complex to install and typically require professional installation.
Installing heated flooring in a barndominium can transform a cold, hard floor into a warm, inviting surface that enhances the comfort of your living space. This DIY guide will focus on the installation of an electric heated flooring system, which is more accessible for DIY enthusiasts due to its simplicity compared to hydronic systems. Before embarking on this project, ensure you have a clear understanding of the electrical requirements and that your flooring material is compatible with heated floors. Here’s a light step-by-step guide to help you through the process.
Step 1: Planning and Preparation
A. **Choose the Right System**
– Research and select an electric radiant floor heating system suitable for your floor type (e.g., tile, laminate, or engineered wood). Kits often come in various sizes and include a heating mat, thermostat, and installation materials.
B. **Calculate the Floor Area**– Measure the space to be heated, avoiding fixed units or fixtures since you should not install heating elements beneath them.
C. **Gather Materials and Tools**- Besides the heating kit, you’ll need a digital multimeter, utility knife, trowel, mortar (for tile installations), and possibly a new dedicated circuit breaker and wire if your current electrical system requires it.
Step 2: Electrical Preparations
A. **Check Electrical Capacity**- Ensure your electrical system can handle the additional load. It may be necessary to install a new circuit breaker. Consulting with an electrician is advisable to ensure compliance with local codes.
B. **Install Thermostat**- Install the thermostat according to the manufacturer’s instructions, typically on a wall where it can accurately measure room temperature. It’s often connected to a power supply and the heating mat.
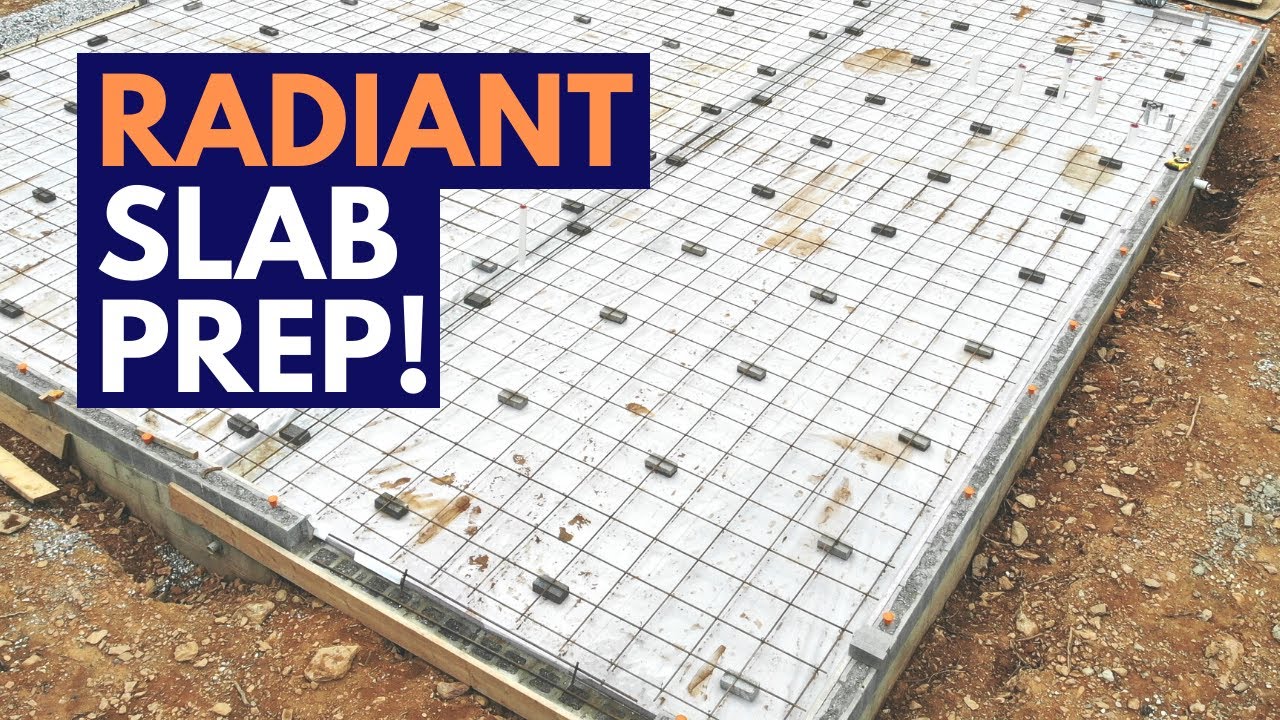
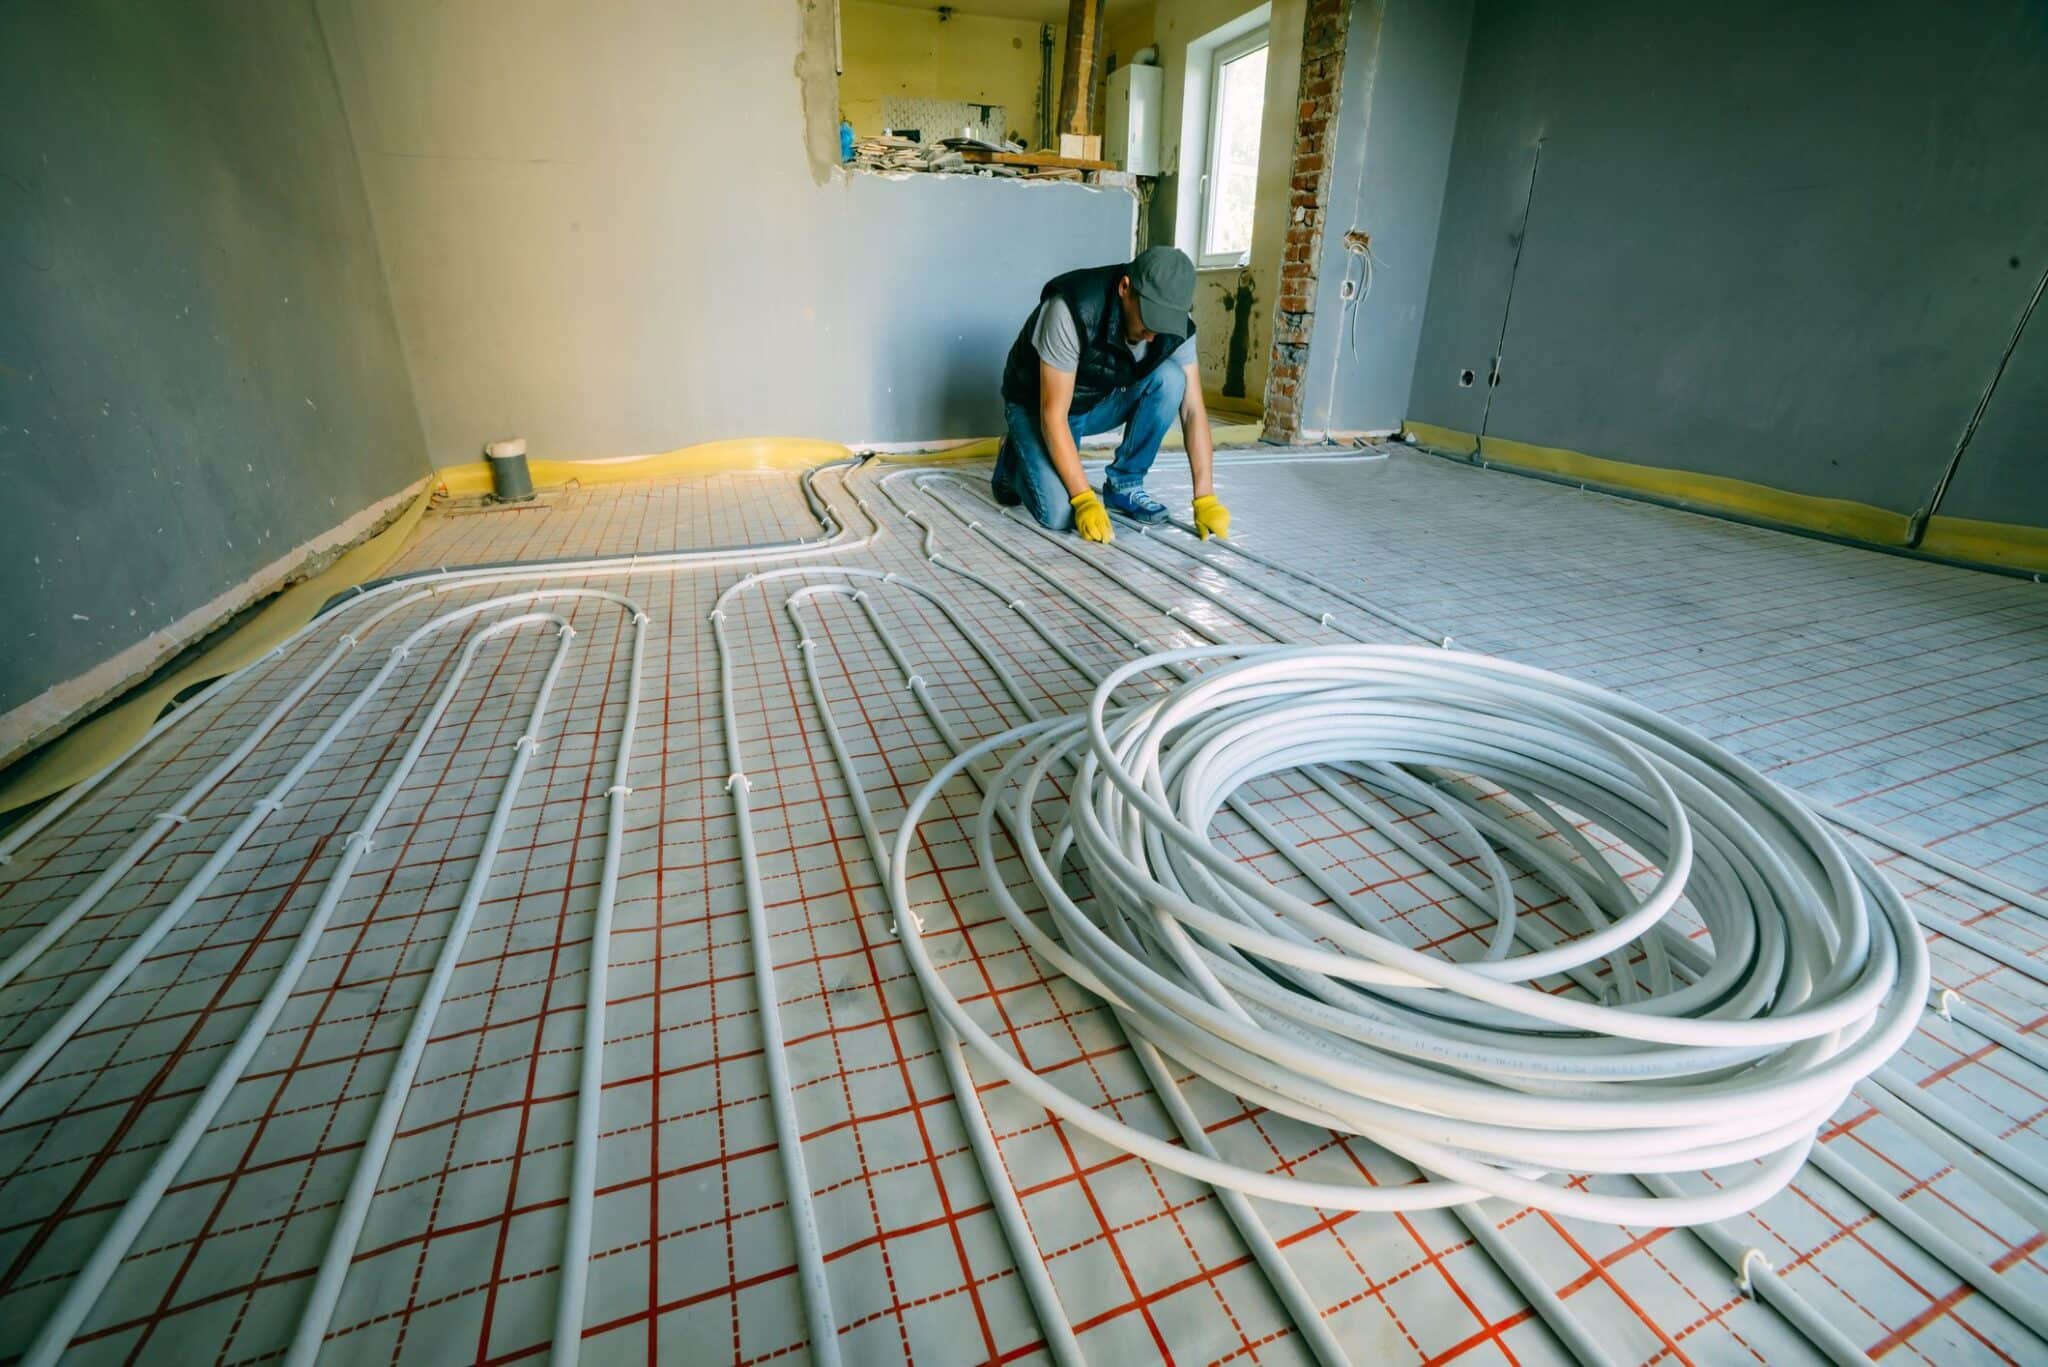
Step 3: Subfloor Preparation
– Ensure the subfloor is clean, dry, and level. Repair any cracks or uneven areas. For optimal efficiency, consider installing insulation boards beneath the heating elements to reflect heat upwards.
Step 4: Layout and Installation of Heating Mat
A. **Dry Layout**- Plan the layout of the heating mat on the floor, avoiding areas where fixtures will be installed. Trim the mesh (not the wires) to fit the area as needed, using the utility knife.
B. **Secure Heating Mat**- Following the manufacturer’s instructions, adhere the mat to the subfloor. For some products, this may involve peeling and sticking, while others may require a thin-set mortar application first.
C. **Electrical Connections**- Connect the heating mat’s wires to the thermostat and power supply, adhering to the wiring diagram provided by the manufacturer. This is a critical step; if you’re not familiar with electrical work, consider hiring an electrician.
Step 5: Test the System
– Before laying the final flooring, perform a resistance test with a digital multimeter to ensure the heating system is working correctly. This step is crucial to avoid any future issues once the floor is laid.
Step 6: Install Flooring
– Follow the specific instructions provided for your type of flooring. For tile floors, apply a layer of thin-set mortar over the heating mat, lay the tiles, and then grout as usual. For laminate or engineered wood, ensure the heating mat is compatible and follow the flooring manufacturer’s instructions for installation over a radiant heat source.
Step 7: Final Testing and Configuration
– Once the floor is installed, test the heating system again to ensure it’s fully operational. Configure the thermostat according to your preferences, setting up any desired schedules or temperature settings.
Maintenance and Troubleshooting
– After installation, maintenance is generally minimal. Keep the thermostat and system free from dust and periodically check the system’s performance. If you encounter any issues, refer to the manufacturer’s troubleshooting guide or consult with a professional.
Cost of Radiant Floor Heating
The cost of installing radiant floor heating in a Steel Frame Barndominium, including a barndominium, varies widely based on several factors such as the type of system (electric vs. hydronic), the size of the area to be heated, the complexity of the installation, and the geographical location. Below is a general breakdown of the costs associated with both electric and hydronic radiant floor heating systems to give you an idea of what to expect financially.
Electric Radiant Floor Heating Costs
Electric radiant floor heating systems involve the installation of electric cables or mats beneath the floor surface. They are typically easier and less costly to install than hydronic systems, especially for smaller areas or individual rooms.
– **Material Costs**: The price for electric heating mats or cables can range from $5 to $10 per square foot. This price does not include the thermostat, which can add another $150 to $200 to the overall cost.
– **Installation Costs**: If you choose to install the system yourself, you can save on labor costs. However, if you hire professionals, expect to pay an additional $8 to $15 per square foot for installation. The cost can vary based on the complexity of the installation and local labor rates.
– **Total Costs**: For a DIY project, the cost might range from $5 to $10 per square foot, primarily covering materials. With professional installation, the cost can increase to $13 to $25 per square foot, including materials and labor.
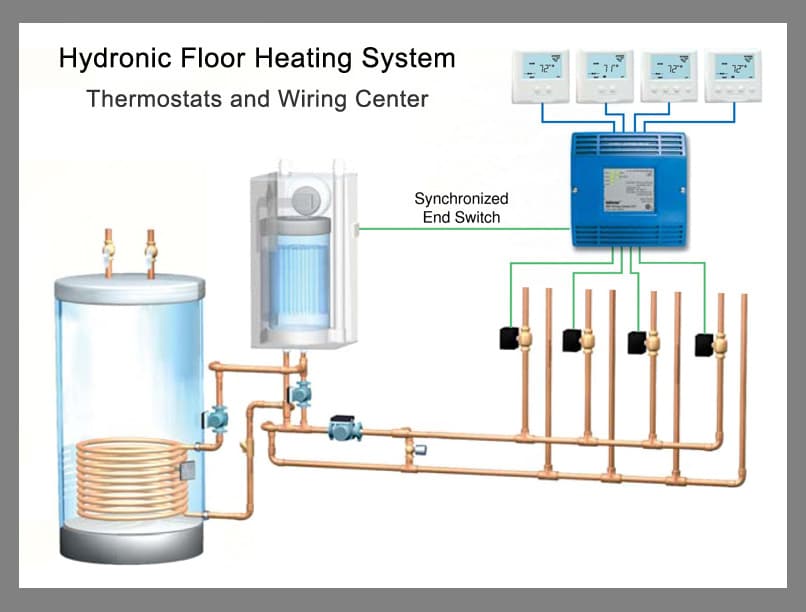
Hydronic Radiant Floor Heating Costs
Hydronic systems, which circulate heated water through tubing installed beneath the floor, are more efficient for heating larger spaces and are often chosen for new construction or major renovations.
– **Material Costs**: The materials for a hydronic radiant floor system, including tubing, manifolds, and a boiler or water heater, can range from $2 to $4 per square foot. However, the boiler or water heater can significantly increase costs, potentially by thousands of dollars, depending on the system’s capacity.
– **Installation Costs**: Hydronic systems are complex to install and typically require professional installation. Labor costs can range from $6 to $20 per square foot, influenced by the installation’s complexity and local labor rates.
– **Total Costs**: Including all components and professional installation, hydronic radiant floor heating can cost between $8 to $24 per square foot.
Additional Considerations
– **Floor Covering**: The type of floor covering you choose can affect the overall efficiency and cost of the radiant floor heating system. Tile and stone are excellent conductors of heat, while carpet and wood may require higher temperatures to achieve the same level of warmth.
– **Insulation**: Proper insulation is crucial for maximizing the efficiency of a radiant floor heating system. Insulating the subfloor can prevent heat loss, ensuring more heat radiates upward into the room. This can involve additional costs but will save on heating bills in the long run.
– **Operating Costs**: Electric systems might have higher operating costs compared to hydronic systems, especially in areas with high electricity prices. However, the actual operating cost will depend on the system’s efficiency, the insulated properties of the barndominium, and the local climate and energy prices.
The cost of installing radiant floor heating in a barndominium can vary greatly. While electric systems may be more suitable for smaller areas or for those looking for a DIY project, hydronic systems are generally more efficient for larger spaces but require a higher initial investment. Careful planning and consideration of both the upfront and long-term costs will help you choose the best system for your needs and budget.

Overall
Installing heated flooring in a barndominium can be a rewarding DIY project that adds comfort and value to your home. By following these detailed steps and adhering to the manufacturer’s instructions and local building codes, you can successfully install an electric heated flooring system. Remember, when in doubt, especially regarding electrical connections, consult with or hire a professional to ensure a safe and efficient installation.