Understanding Barndominium Rough-In Plumbing
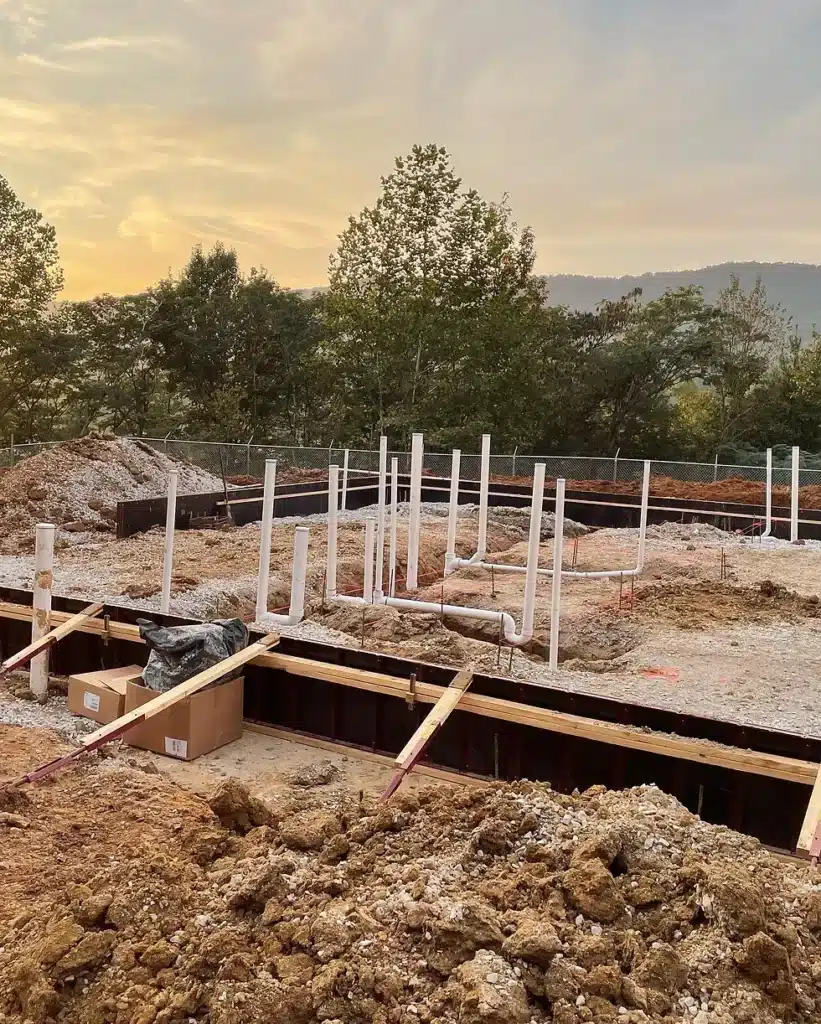
Rough-in plumbing refers to the initial underground pipes and provisions installed in relation to a concrete foundation slab to facilitate drain and water supply connections later when finishing interior spaces. in this article, I’ve included some key aspects of rough-in plumbing in regard to Steel Frame Barndominium kit builds and Slab foundations in particular.
Before exterior steel panels and interior drywall finishes enclose Barndominium floors and walls, crucial rough-in plumbing must run the proper drainage, feeds, and vent piping throughout the interior framework of the Barndominium, being extra sure to carefully plot each sediment trap, supply riser, and fixture making sure each is cleared precisely. This infrastructure backbone supports drain assemblies, faucets, and appliances and ensures they are flowing and operating smoothly with no blockages or obstructions once the is home finished.
Planning the critical Pipe Layout
Rough-in plumbing begins digitally sketching accurate home drainage schematics indicating optimal pipe routing for sinks, toilets, and utilities in the barndominium based on architectural Floor Plans. Plumbers plot best pathways aligning drain positionings with waste stack vents minimizing pipe lengths and awkward junctions.
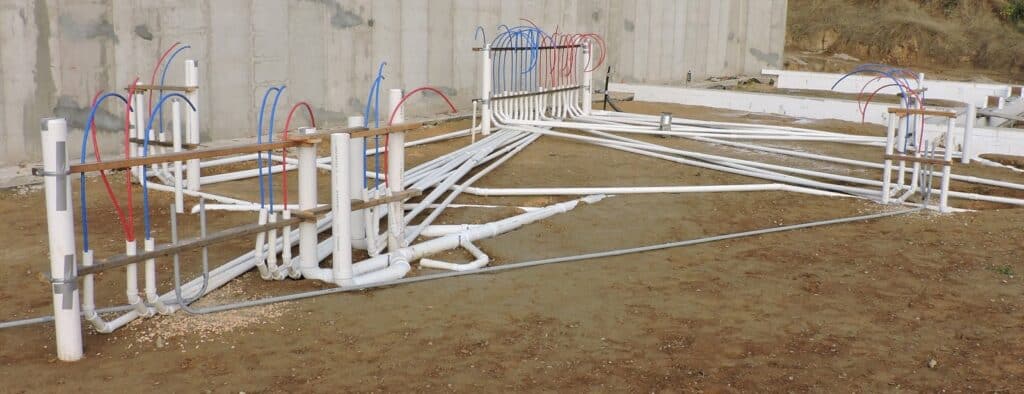
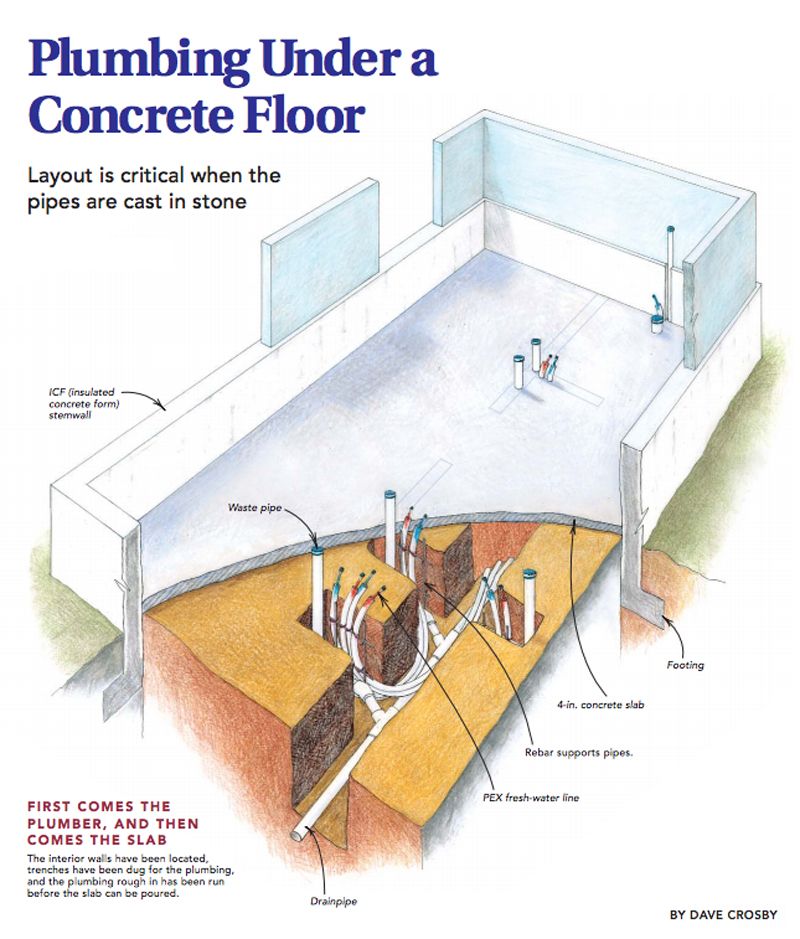
- Penetrations – Setting up sleeves, plates, or boxes wherever pipes intersect the slab to feed up into bath, kitchen, etc areas above the floor.
- Incoming water main – Running domestic water supply piping inside building footprint to distribute later upwards.
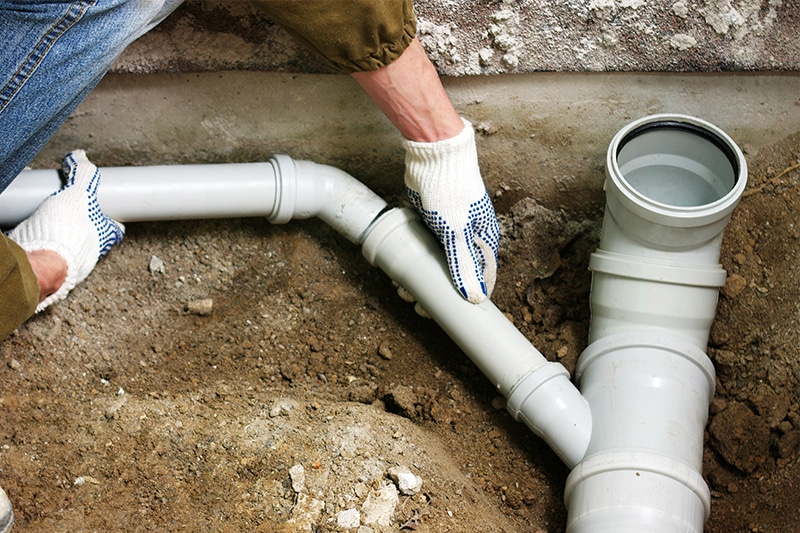
- Underground drainage – Assembling the main wastewater pipes at proper slope gradients leading to the municipal sewer/septic system tie-in point.
Installing Drains and Vent Stacks
With layouts approved, plumbers establish main drain lines first with appropriate gradient slopes to facilitate downward waste flows. Upward vent stacks then tie-in relieved by roof terminations dispersing sewer gas buildup. Careful leveling and section assembly prevent backflow problems ahead and will allow all waste to gradually flow downhill with gravity, the key is to balance the angle to where the waste will not move too fast nor too slow to avoid blockage issues as well as backup.
Running Supply Lines and Setting Fixture Tees
Hot and cold water lines route from the incoming home water main through drilled bottom plates securing to floor joists overhead towards fixture areas needing connections later. At each intended faucet or appliance location, stubbed drop ear tees orient properly to accept finishes. Absorbing couplings allow adjustment as needed while build-outs commence.
Inspecting and Documenting Rough-Ins
Before covering walls and ceilings, plumbing inspectors validate rough-ins to meet codes checking slopes, fittings, materials, and test connections briefly. Photos and As-Builts capture corner locations and system specifics for reference as final hook-ups approach. Thorough rough-ins prevent major changes later.
- Inspections – Getting local plumbing inspector sign-off on rough-in arrangements before pouring slab over buried infrastructure.
- Documentation – Recording exact pipe locations, materials, and test results for later reference when finishing connections need to tap into rough-in components under the cured slab
With essential pipes pre-routed inside the barndominium and around critical Steel framework properly, finishing crews then can make Quick work of easy hook-ups to simplify the installation of home fixtures for long-term operational reliability.


